前段时间有点忙,这几天闲下来逛了下看雪,发现一篇有意思的帖子1,就照着思路复现一下,纯当练手了。(后续测试最新版,发现该思路依然能打)
ok,直接进入主题。一开始为了测试该APK是否具有frida检测,我就用我自己写的一个小脚本测试了一下,脚本的作用是打印相关协议通信内容,打印出的内容如下:
frida -U -f tv.danmaku.bili -l SSLRequestHook.js --no-pause
     ____
    / _  |   Frida 15.2.2 - A world-class dynamic instrumentation toolkit
   | (_| |
    > _  |   Commands:
   /_/ |_|       help      -> Displays the help system
   . . . .       object?   -> Display information about 'object'
   . . . .       exit/quit -> Exit
   . . . .
   . . . .   More info at https://frida.re/docs/home/
   . . . .
   . . . .   Connected to Pixel 2 (id=HT84P1A01793)
Spawned `tv.danmaku.bili`. Resuming main thread!
[Pixel 2::tv.danmaku.bili ]-> ea6a3000  50 52 49 20 2a 20 48 54 54 50 2f 32 2e 30 0d 0a  PRI * HTTP/2.0..
ea6a3010  0d 0a 53 4d 0d 0a 0d 0a 30 31 2c 22 61 62 5f 68  ..SM....01,"ab_h
ea6a3020  65 61 64 65 72 5f 76 65 72 22 3a 32 36 33 35 36  eader_ver":26356
ea6a3030  7d 00 00 00 00 00 00 00 00 00 00 00 00 00 00 00  }...............
可以看到用的协议是结合了SSL的2.0版本的HTTP协议。后面再次用spwan模式测试了一下,发现只要b站的主页面一加载出来(此时,视频封面等还未加载),届时,frida就会被切出。当然,这无法说明前后有什么关联,只是表述下事实。
继续跟着帖子的思路走,接下来就是分析frida的检测到底是在哪里进行的,几乎现在所有的frida检测的逻辑都是在so层实现的,具体的缘由就不多赘述了。
具体的检测逻辑是在哪个so模块中实现的,可以通过打印dlopen函数的参数来获取,只要在打印过程中出现frida被切掉的情况,就能说明frida检测的代码是在最后一个打印的so模块中实现的,打印脚本如下:
function hook_dlopen(){
    var addr  = Module.getExportByName(null,'android_dlopen_ext')
    console.log('*******hook has began*******')
    Interceptor.attach(addr,{
        onEnter:function(args){
            var sofilepath = args[0]
            if(sofilepath != undefined && sofilepath != null){
                console.log('this sofile path is => ',ptr(sofilepath).readCString())
            }
        },
        onLeave:function(retval){
        }
    })
    console.log('*******hook is over*******')
}

function main(){
    hook_dlopen()
}

setImmediate(main)
脚本运行结果如下:
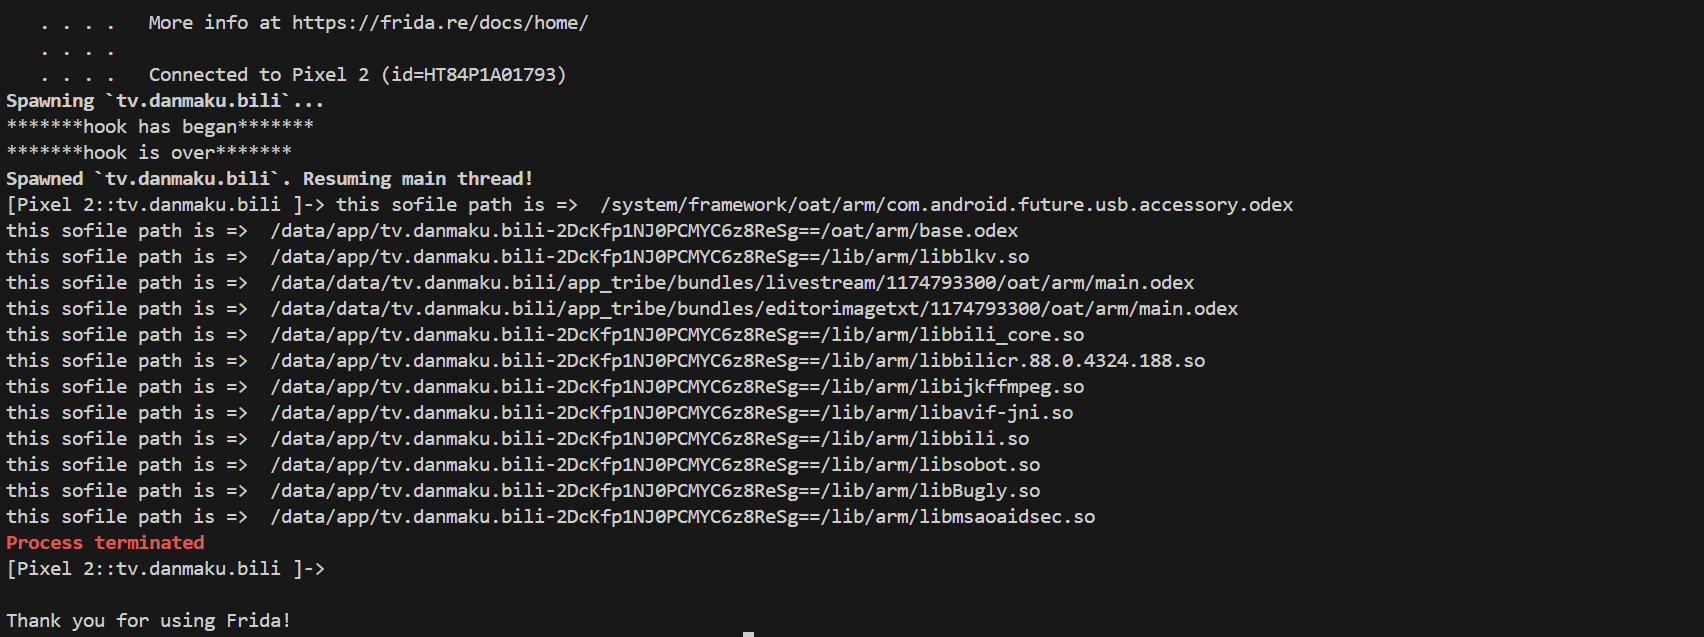
不难发现,frida运行到libmsaoaidsec.so文件就被切出,就说明了frida的检测代码在该so模块下。
成功定位检测函数所在模块后,接下来,就需要对检测函数在模块内的具体位置进行分析了。由于so模块的加载过程中涉及到多个函数配合,而检测函数的具体位置可能出现在这些函数中,因此需要对检测函数在哪一函数中运行确认。
下面先对JNI_Onload函数进行hook,如果hook的打印出现了,就说明检测函数在JNI_Onload函数加载后运行,如果没有出现frida就被切出去了,说明检测函数在JNI_Onload函数加载前运行。
下面是对应so模块下JNI_OnLoad函数的地址:
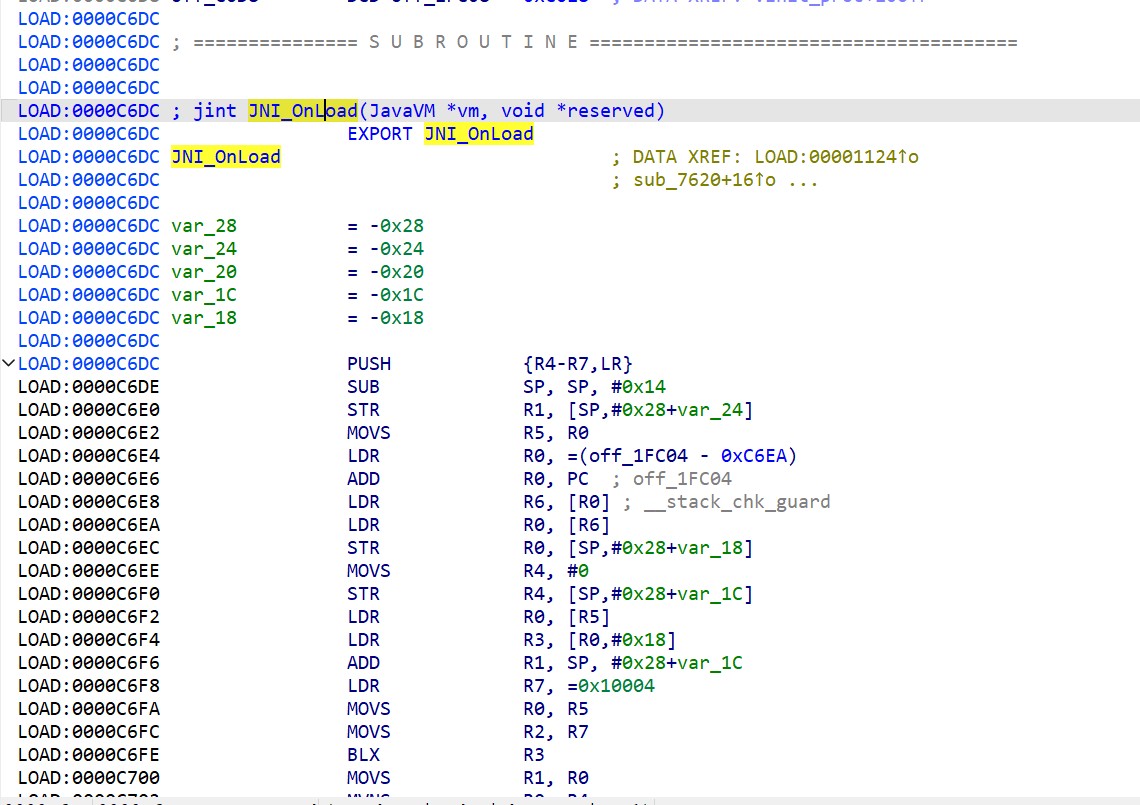
不难发现JNI_OnLoad函数的地址为:0xc6dc,接下来就可以编写脚本进行测试了,测试脚本如下:
//这个脚本是用来测试JNI_Onload函数是否被调用
function hook_dlopen(){
    var addr  = Module.getExportByName(null,'android_dlopen_ext')
    var istrue //一个全局变量,用于在onEnter和onLeave之间传递状态

    Interceptor.attach(addr,{
        onEnter:function(args){
            var sofilepath = ptr(args[0]).readCString()//将指针所指内容转为字符串
            if(sofilepath.indexOf('libmsaoaidsec.so') >= 0){
                console.log('this sofile path is => ',sofilepath)
                istrue = true
            }
        },
        onLeave:function(retval){ //只有捕捉到libmsaoaidsec.so模块时才对该模块下的JNI_Onload函数进行hook,而其他的so模块直接过滤
            if(istrue){
                console.log('hello')
                hook_JNIOnload()
            }
        }
    })
}

function hook_JNIOnload(){
    var module_addr = Module.getBaseAddress('libmsaoaidsec.so')//模块基址
    var func_addr = module_addr.add(0xc6dc)//JNI_Onload的地址
    Interceptor.attach(func_addr,{
        onEnter:function(args){
            console.log('*******JNI_Onload has been invoked*******')
        },
        onLeave:function(retval){
            console.log('*******JNI_Onload hook is over*******')
        }
    })
}


function main(){
    hook_dlopen()
}

setImmediate(main)
运行结果如下图:
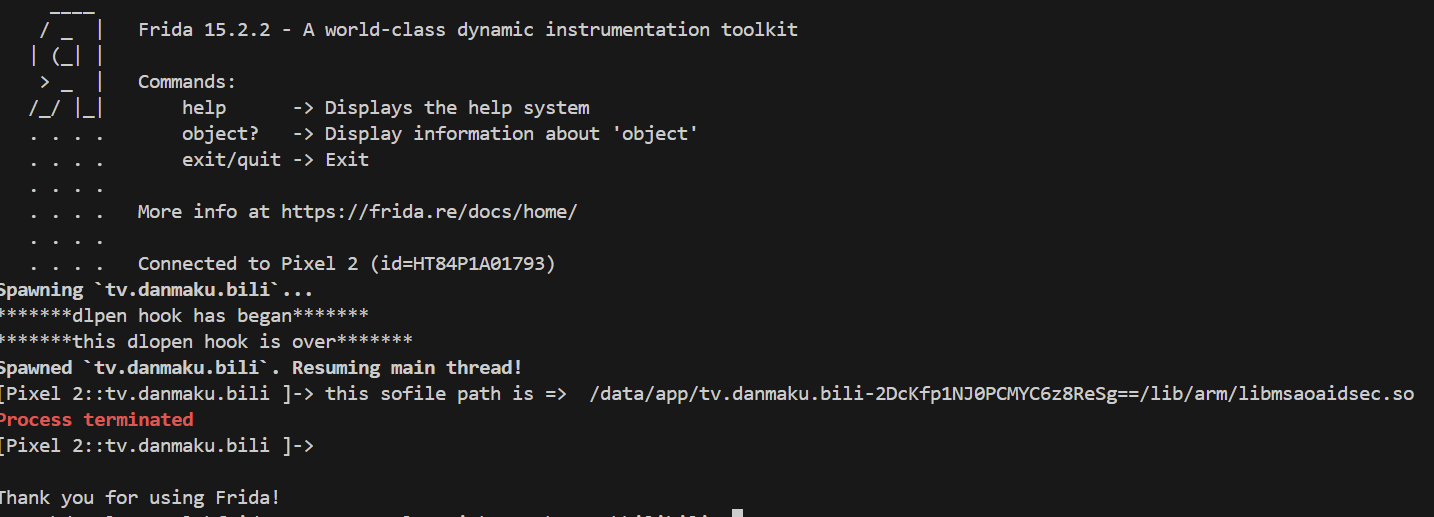
这里我要解释下为什么hello没打印出来,这是因为onLeave回调函数运行时,dlopen函数就已经运行结束了,紧接着,由于so加载流程中的一些函数(比如:init函数)加载的太快,导致onLeave回调函数还未运行,frida检测函数就已经运行从而将frida切出去了,因此我的hello没有打印出来。
但这也正说明了frida的检测代码是在JNI_OnLoad函数之前实现的,因此可以去查看init函数,看看它的逻辑,以便为后续的hook提供一个较好的思路。(这里涉及到了so的装载、链接、初始化、JNI_OnLoad加载等知识,建议参考肉丝写的这篇帖子2)
不过,很不幸,init函数被OLLVM混淆了,下面是它混淆后的逻辑块执行图:
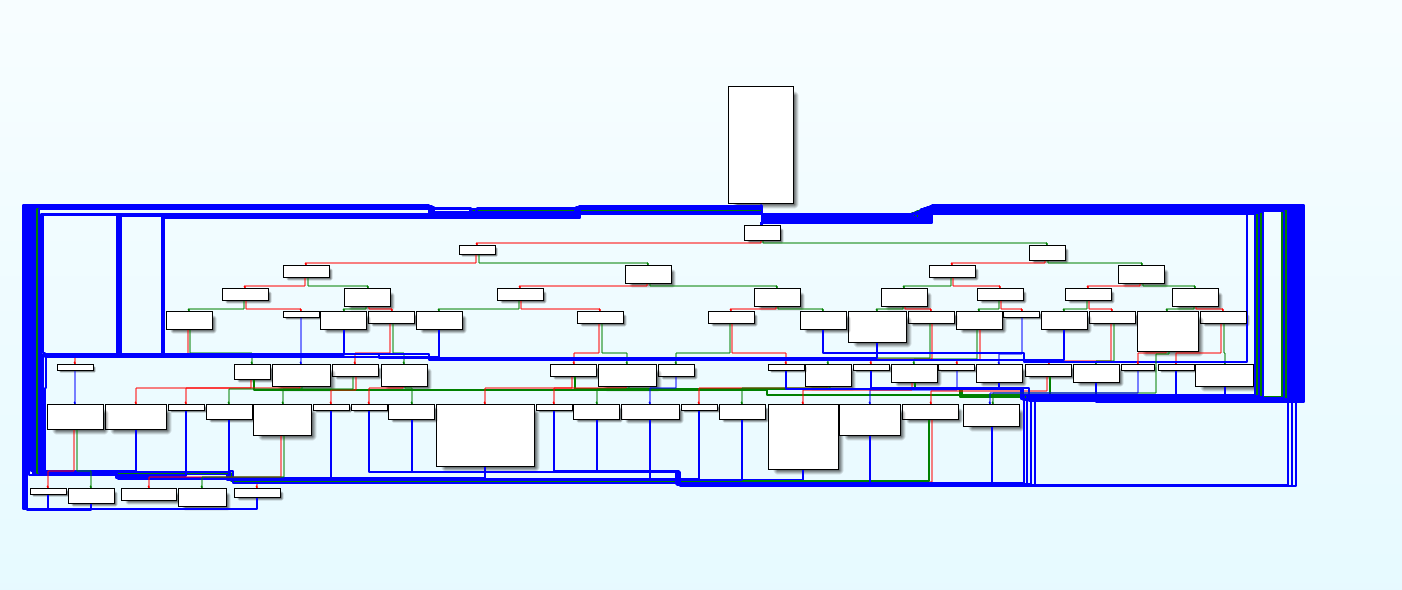
有兴趣的可以去实施去混淆。
虽然该函数被混淆了,但还是能看出在该函数的逻辑中,有一个函数被较早的执行了,如下图:sub_B1B4函数:
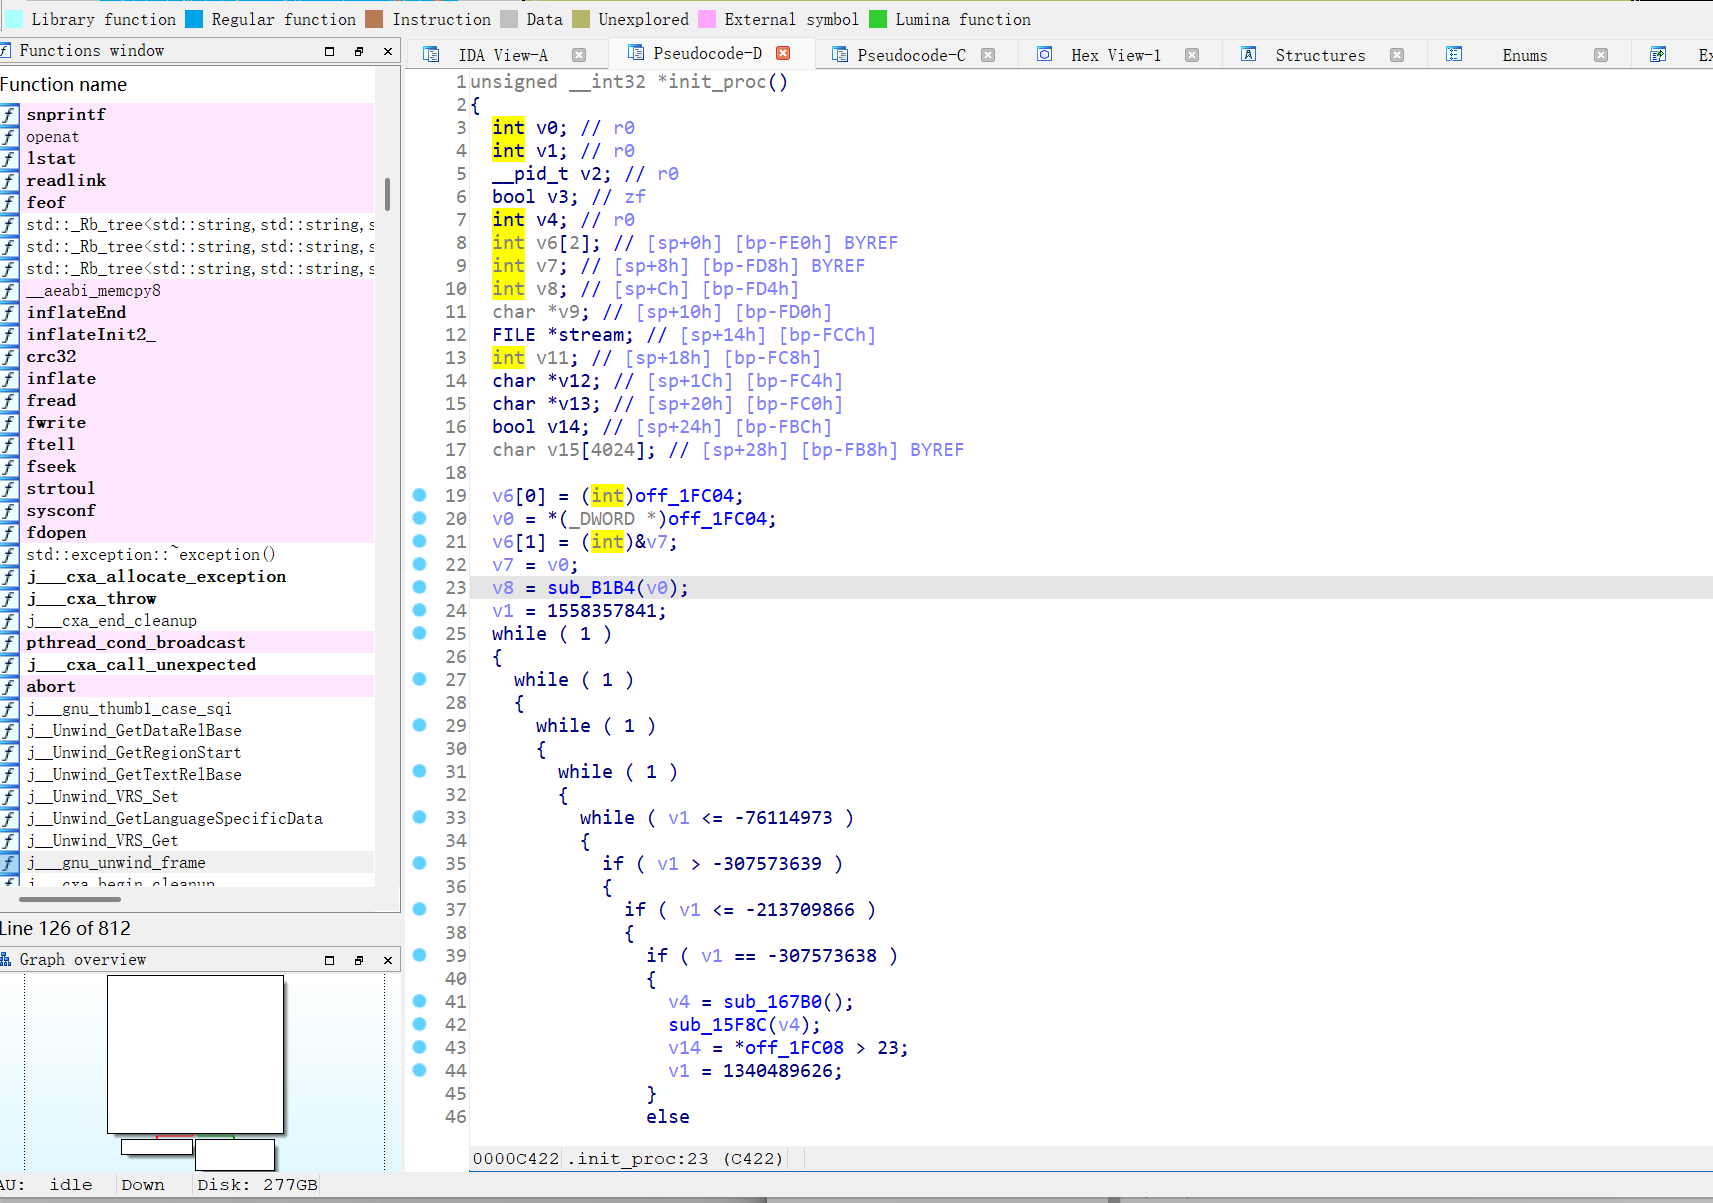
进去后发现,该函数就是原帖主所说的_system_property_get函数,且该函数的参数正是原帖主所说的关键字符串ro.build.version.sdk。
由于该函数执行的时机在init函数中非常早,那么大概率是早于frida的检测,因此,接下来用脚本去测试一下,看能不能打印到pthread_create函数的参数信息,如果能打印到不同的参数信息,那么该参数信息大概率就是我们想要的frida检测函数的入口地址。
测试脚本如下:
function hook_dlopen(){
    var addr  = Module.getExportByName(null,'android_dlopen_ext')
    Interceptor.attach(addr,{
        onEnter:function(args){
            var module_name = ptr(args[0]).readCString()
            if( module_name.indexOf('libmsaoaidsec.so') >= 0 ){
                //此时模块才刚被dlopen找到,开始对system_get_funcaddr函数监控hook(实际上是监控了init_proc函数内部)
                console.log('libmsaoaidsec.so has been found => ', module_name)
                hook_system_property_get()
            }
        },
        onLeave:function(retval){
        }
    })
}

function hook_system_property_get(){
    //var libmsaoaidsec_baseaddr = Module.getBaseAddress('libmsaoaidsec.so')//libmsaoaidsec.so模块的基址
    //var _system_property_get_funcaddr = libmsaoaidsec_baseaddr.add(0xb1b4)//通过ida查看system_property_get函数在该模块下的偏移
    var _system_property_get_funcaddr = Module.getExportByName(null, "__system_property_get")
    console.log('system_property_get_funcaddress is => ',_system_property_get_funcaddr)
    Interceptor.attach(_system_property_get_funcaddr,{
        onEnter:function(args){
            if( ptr(args[0]).readCString().indexOf('ro.build.version.sdk') >= 0){//如果找到我们想要的那个_system_property_ge函数
                console.log('the _system_property_get_func we want has been found, its para is => ',ptr(args[0]).readCString())
                //开始对pthread_create进行hook,hook线程开启的检测地址(也就是frida检测函数起始地址)
                hook_pthread_create()
                //找到地址后对该地址上函数进行nop,从而绕过检测
                //bypass()
            }
        },
        onLeave:function(retval){
        }
    })
}

function hook_pthread_create(){
    var pthread_create_funcaddr = Module.getExportByName('libc.so','pthread_create')
    var libmsaoaidsec_baseaddr = Module.getBaseAddress('libmsaoaidsec.so')

    console.log('libmsaoodsec.so baseaddress is => ',libmsaoaidsec_baseaddr)

    Interceptor.attach(pthread_create_funcaddr,{
        onEnter:function(args){
            console.log('func address is => ',args[2])
        },
        onLeave:function(retval){
        }
    })
}

function main(){
    hook_dlopen()
}

setImmediate(main)
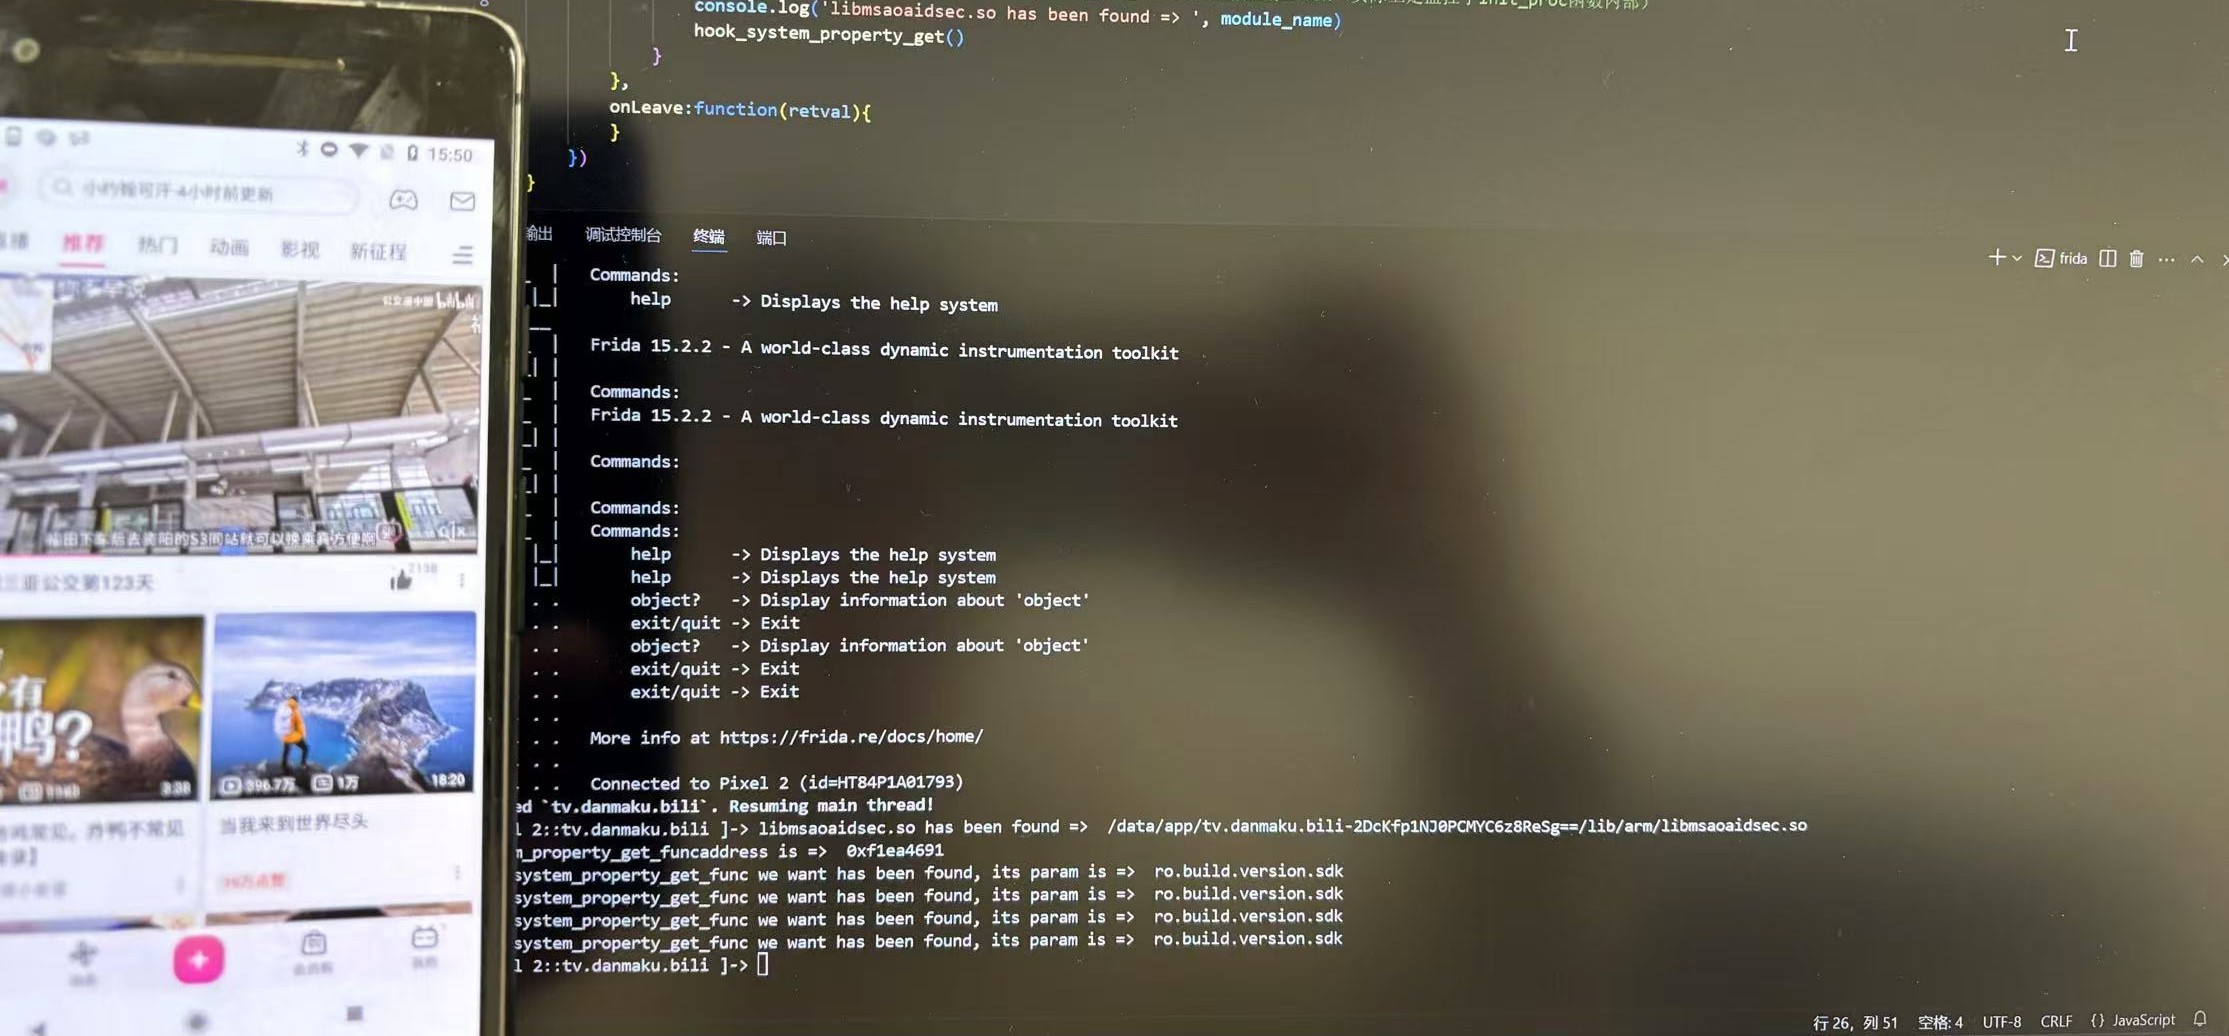
运行结果如下:
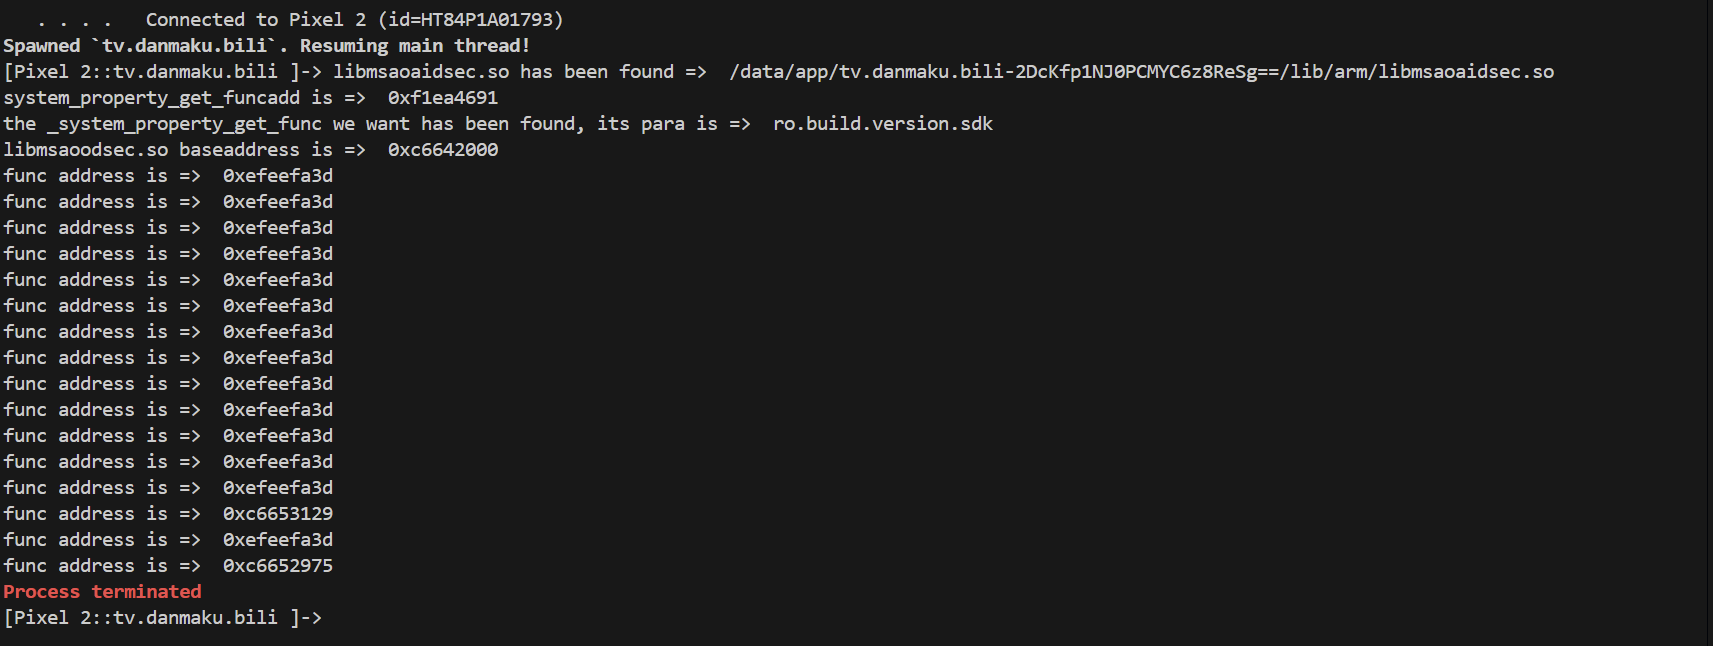
不难算出,对应的函数偏移为:0x11129 和 0x10975
到这一步,其实整个过程就已经尾声了,接下来就看你想对这两个函数操刀了。我这里的具体做法是去hookpthread_create函数,通过参数过滤对其进行replace替换,进而实现绕过。关于这里的实现代码我就不给出来了,下面看看我运行后的效果图:
ok,大功告成。